
Overnight Oats
Day: September 23, 2024

Tiramisu Overnight Oats
Tiramisu Overnight Oats
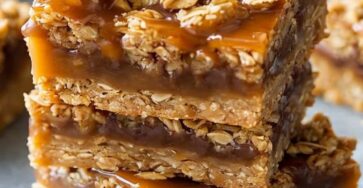
Caramel Apple Oatmeal Bars
Caramel Apple Oatmeal Bars

Henry Bars
Henry Bars

Slow Cooker Bourbon Short Ribs with Cheesy Grits
Slow Cooker Bourbon Short Ribs with Cheesy Grits

Slow Cooker Beef and Bean Chili
Slow Cooker Beef and Bean Chili

Loaded Sheet Pan Nachos
Loaded Sheet Pan Nachos

Loaded Sheet Pan Quesadillas
Loaded Sheet Pan Quesadillas

Easy Rice and Beans Freezer Burritos
Easy Rice and Beans Freezer Burritos

Easy Grilled Gochujang Chicken Thighs
Easy Grilled Gochujang Chicken Thighs