Lasagna Soup: A Comforting Twist on a Classic Dish

Lasagna is a beloved Italian classic, known for its layers of pasta, rich meat sauce, creamy cheese, and decadent flavors. But what if you could take all the mouth-watering components of lasagna and turn them into a warm, hearty soup? Enter lasagna soup—a modern, comforting take on the traditional lasagna. This dish combines all the flavors you love from lasagna into one easy-to-make, bowl-friendly meal. In this article, we’ll walk you through everything you need to know about making lasagna soup, from its ingredients to its preparation and even some variations to suit your preferences.

What is Lasagna Soup?

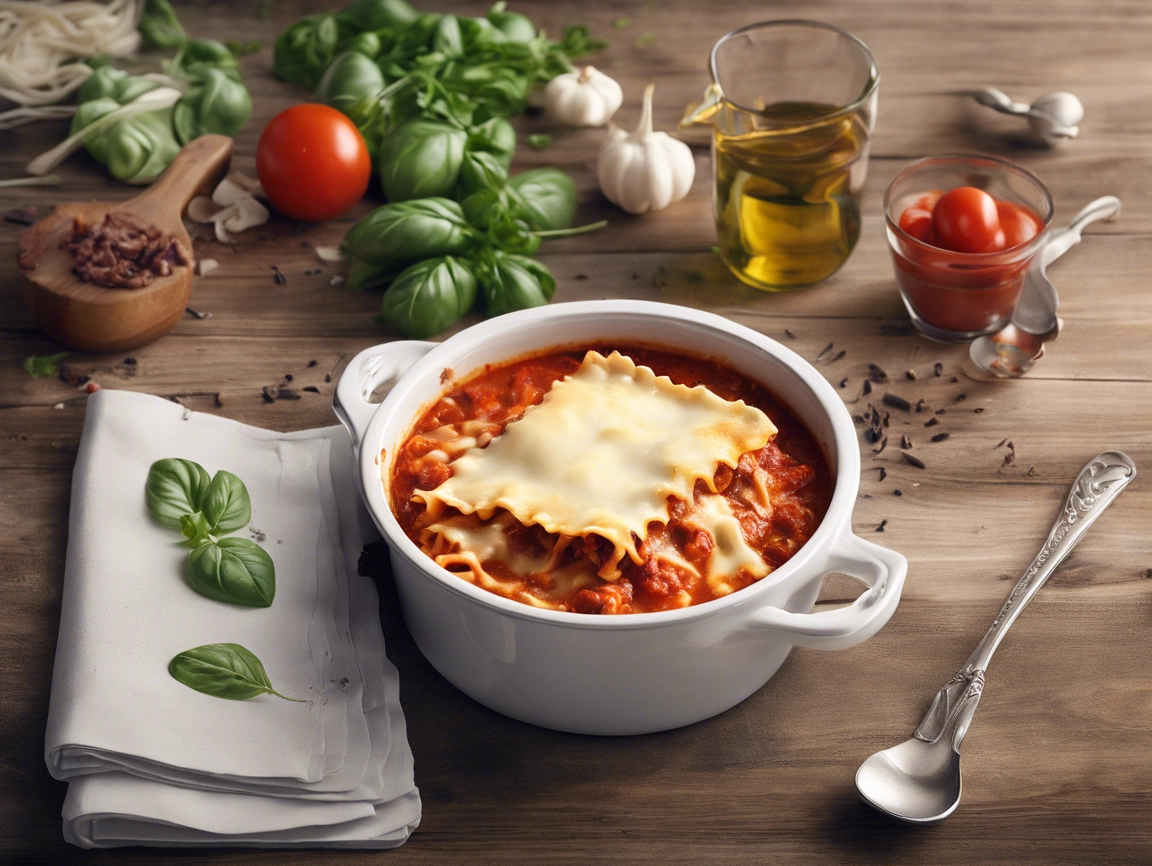
Lasagna soup is exactly what it sounds like—an inventive fusion of the familiar lasagna flavors, but in soup form. Instead of layering pasta, meat, cheese, and sauce in a baking dish, the ingredients are combined into a flavor-packed broth. Think of it as deconstructed lasagna. It’s faster to make, less messy to serve, and just as delicious!

The best part? Lasagna soup is perfect for meal prep and can be customized based on dietary preferences, making it a go-to for busy families and anyone looking for a wholesome, comforting dinner.

Ingredients You’ll Need

To make a classic lasagna soup, you’ll need a combination of basic ingredients that you likely already have in your pantry. Here’s a breakdown:

  • Ground beef or sausage: This is the base for the meaty component. Ground beef is commonly used, but Italian sausage adds a lot of extra flavor.
  • Onions and garlic: Essential for building depth in your soup’s flavor profile.
  • Crushed tomatoes or tomato sauce: These bring the rich, savory taste of tomatoes to your soup, which is the hallmark of any good lasagna.
  • Lasagna noodles: Broken into bite-sized pieces, lasagna noodles provide the classic pasta element of the dish.
  • Broth: Chicken or beef broth works best to create the soup base, making it rich and flavorful.
  • Herbs: A mix of basil, oregano, thyme, and bay leaves will bring out that authentic Italian flavor.
  • Cheese: Mozzarella and ricotta cheese are essential for recreating the creamy, cheesy aspect of lasagna. Parmesan is often added for extra flavor.
  • Red pepper flakes: For a bit of heat, optional but recommended.

Step-by-Step Guide to Making Lasagna Soup

1. Brown the Meat

Start by browning your ground beef or sausage in a large pot over medium heat. If you’re looking for a healthier option, you can use ground turkey instead. Break up the meat as it cooks and ensure it’s browned evenly. Once done, drain off any excess fat to keep the soup from becoming greasy.

2. Sauté Onions and Garlic

In the same pot, add diced onions and minced garlic, cooking until they are soft and translucent. This will infuse the base of your soup with a rich, aromatic flavor that will permeate throughout the dish.

3. Add Tomatoes and Broth

Once your onions and garlic are sautéed, pour in the crushed tomatoes or tomato sauce along with your broth. The combination of tomatoes and broth will form the savory, tomato-based broth that makes lasagna soup so comforting. You can use chicken broth for a lighter taste or beef broth for a deeper, richer flavor.

4. Season with Herbs

Next, stir in your herbs: basil, oregano, thyme, and bay leaves. These herbs give the soup its distinctive Italian flair. For a touch of heat, sprinkle in some red pepper flakes. Let this simmer for about 15-20 minutes to allow the flavors to meld together beautifully.

5. Cook the Noodles

While your soup base is simmering, bring a separate pot of water to a boil and cook your lasagna noodles. Break them into smaller, bite-sized pieces to make them more soup-friendly. Cook until they are al dente, then drain and set aside. Some prefer to cook the noodles directly in the soup, but cooking them separately prevents them from becoming too soft and soggy.

6. Combine Everything

Once the noodles are cooked and your soup base has simmered to perfection, add the noodles into the pot. Give it a good stir, ensuring the pasta is evenly distributed throughout the soup.

7. Cheese It Up

No lasagna is complete without cheese, and lasagna soup is no exception. Stir in ricotta and mozzarella cheese just before serving. The cheeses will melt into the hot soup, creating a creamy, decadent finish that mimics the gooey layers of traditional lasagna. You can also top each bowl with grated Parmesan for extra flavor.

8. Garnish and Serve

Once everything is combined, ladle the soup into bowls. Garnish with a little extra Parmesan cheese and some fresh basil for an authentic Italian touch. Your comforting bowl of lasagna soup is now ready to be served!

Why You’ll Love Lasagna Soup

There are many reasons why this twist on traditional lasagna has become a family favorite:

  • Faster to make: Traditional lasagna can take over an hour to prepare and bake, but lasagna soup comes together in about 30 minutes.
  • Easier to serve: No messy layers to cut and serve; just ladle the soup into bowls and you’re good to go.
  • One-pot meal: This dish minimizes the number of dirty dishes, making cleanup a breeze.
  • Customizable: Whether you prefer it spicier, cheesier, or want to add some extra vegetables, lasagna soup can be easily adapted to your taste.

Variations of Lasagna Soup

The beauty of lasagna soup is that it’s incredibly versatile. Here are a few variations you can try:

1. Vegetarian Lasagna Soup

To make this dish vegetarian, simply omit the meat and use vegetable broth. You can add more veggies like zucchini, mushrooms, or spinach to make it hearty and satisfying.

2. Gluten-Free Lasagna Soup

For those who are gluten-sensitive, use gluten-free pasta and double-check that your broth and other ingredients are gluten-free.

3. Dairy-Free Lasagna Soup

If you’re lactose intolerant or avoiding dairy, you can skip the cheese or substitute it with dairy-free cheese alternatives. Nutritional yeast is another great way to add a cheesy flavor without the dairy.

4. Spicy Lasagna Soup

If you like a bit of heat, increase the amount of red pepper flakes or add a chopped jalapeño to the soup. You could also use spicy Italian sausage instead of ground beef for an extra kick.

Tips for Storing and Reheating

Lasagna soup is perfect for meal prep because it stores well in the fridge or freezer.

  • Refrigerate: Store leftovers in an airtight container in the refrigerator for up to 4 days.
  • Freeze: Lasagna soup also freezes well. Just make sure to freeze the soup and noodles separately, as the pasta can become mushy after being frozen. When reheating, add the noodles back in and heat thoroughly on the stove.

Serving Suggestions

While lasagna soup is delicious on its own, it pairs wonderfully with some side dishes to complete the meal. Here are a few ideas:

  • Garlic bread: Perfect for dipping into the rich tomato broth.
  • Caesar salad: A light, crisp salad balances the richness of the soup.
  • Roasted vegetables: A side of roasted zucchini or asparagus can add some extra nutrition to your meal.

Conclusion

Lasagna soup is the perfect dish for anyone who loves the flavors of lasagna but craves a quicker, easier, and cozier meal. With all the comforting elements of traditional lasagna—pasta, savory meat sauce, and creamy cheese—this soup delivers big on taste without the hassle. Whether you’re cooking for a weeknight dinner or a cozy weekend meal, lasagna soup is sure to satisfy. Try out different variations to make it your own, and don’t forget to serve it with some crusty bread for dipping. Happy cooking!

How to Make a Grilled Chicken & Black Bean Bowl with Avocado

This recipe is perfect for a quick, nutritious meal. The combination of black beans, grilled chicken, and avocado creates a hearty dish packed with protein, healthy fats, and fiber.

Ingredients:

  • 1 can (15 oz) of black beans, drained and rinsed
  • 2 boneless, skinless chicken breasts
  • 1 ripe avocado, diced
  • 1 cup of cooked brown rice (optional)
  • 1/2 cup of corn (fresh, frozen, or canned)
  • 1/4 cup of red onion, finely chopped
  • 1/2 cup of cherry tomatoes, halved
  • 1/4 cup of fresh cilantro, chopped
  • 1 lime, cut into wedges
  • 1 tsp cumin
  • 1 tsp paprika
  • 1 tsp garlic powder
  • Salt and pepper to taste
  • Olive oil for grilling

Step-by-Step Guide:

1. Prepare the Chicken
In a small bowl, mix cumin, paprika, garlic powder, salt, and pepper. Rub the chicken breasts with olive oil, then coat them with the spice mixture. Preheat a grill or stovetop grill pan over medium heat, and cook the chicken for about 6-7 minutes per side, or until fully cooked. Once done, let the chicken rest for 5 minutes, then slice it.

2. Heat the Black Beans
In a small saucepan, heat the black beans over low heat. Add a pinch of salt and pepper for flavor, and cook until warmed through, about 3-5 minutes. You can add a dash of cumin if you prefer extra seasoning.

3. Assemble the Bowl
Start by adding a layer of cooked brown rice (if using) to the base of each bowl. Then, evenly distribute the black beans, corn, red onions, cherry tomatoes, and avocado on top.

4. Add the Grilled Chicken
Place the sliced grilled chicken over the vegetables and beans. Sprinkle fresh cilantro over the bowl, and squeeze lime wedges for a tangy finish.

5. Serve and Enjoy
Serve the bowls immediately, and feel free to drizzle with your favorite dressing, such as a creamy avocado-lime or a simple olive oil and lime vinaigrette.

Tips:

  • Make it Vegan: Skip the chicken and add more beans or tofu.
  • Meal Prep: Store the components separately and assemble just before eating to keep the veggies fresh.

This grilled chicken and black bean bowl is easy to customize and perfect for a nutritious weeknight dinner!

Red Lentil Curry Recipe

Introduction:
Red lentil curry is a comforting, nutritious, and flavorful dish packed with spices and rich in plant-based protein. It’s perfect for a quick weeknight dinner or meal prepping, as lentils cook quickly and absorb the bold flavors of curry spices beautifully. Below is a detailed guide to making red lentil curry, with all the ingredients and steps you’ll need.

Ingredients:

  • 1 cup of red lentils (rinsed and drained)
  • 1 onion (finely chopped)
  • 2 cloves of garlic (minced)
  • 1 tablespoon of fresh ginger (minced)
  • 2 tablespoons of curry powder (or a combination of cumin, coriander, and turmeric)
  • 1 teaspoon of ground cumin
  • 1 teaspoon of ground coriander
  • 1/2 teaspoon of ground turmeric
  • 1/4 teaspoon of cayenne pepper (optional for heat)
  • 1 can (14 oz) of coconut milk
  • 1 can (14 oz) of diced tomatoes (or fresh chopped tomatoes)
  • 2 cups of vegetable broth (or water)
  • 1 tablespoon of tomato paste (optional for added richness)
  • Salt and pepper to taste
  • Fresh cilantro (for garnish)
  • Juice of half a lime
  • 2 tablespoons of oil (vegetable or coconut oil)

Instructions:

  1. Prepare the Aromatics:
  • Heat the oil in a large pot over medium heat.
  • Add the chopped onions and sauté for about 4-5 minutes until they turn translucent and soft.
  • Stir in the minced garlic and ginger, cooking for another 1-2 minutes until fragrant.
  1. Add the Spices:
  • Stir in the curry powder, cumin, coriander, turmeric, and cayenne pepper (if using). Toast the spices for about 1-2 minutes, ensuring they don’t burn. This step enhances the flavors of the spices, making the curry more aromatic.
  1. Incorporate Tomatoes and Lentils:
  • Add the diced tomatoes (and tomato paste if using), stirring to combine with the spices and onions.
  • Pour in the rinsed lentils, mixing them into the tomato base. Let everything cook for about 2-3 minutes.
  1. Simmer the Curry:
  • Add the vegetable broth and coconut milk to the pot. Stir well to combine all the ingredients.
  • Bring the mixture to a gentle boil, then reduce the heat to low, covering the pot.
  • Let the curry simmer for about 20-25 minutes, stirring occasionally, until the lentils are soft and cooked through. If the curry becomes too thick, you can add more broth or water to adjust the consistency.
  1. Season and Garnish:
  • Once the lentils are fully cooked, season the curry with salt and pepper to taste.
  • Squeeze the juice of half a lime over the curry for a fresh, tangy finish.
  • Garnish with freshly chopped cilantro before serving.

Serving Suggestions:

Red lentil curry pairs beautifully with:

  • Steamed basmati rice or brown rice
  • Naan bread or chapati for dipping
  • A side of sautéed vegetables, such as spinach or broccoli

Tips for Success:

  • Rinse the lentils thoroughly: This removes excess starch and prevents them from becoming too mushy.
  • Adjust the heat: You can add more cayenne or fresh chili peppers for an extra kick or leave it out for a milder curry.
  • Make it creamy: Adding coconut milk makes the curry rich and creamy, but you can substitute it with almond or cashew milk for a lighter version.

Lentil Salad with Pomegranate and Walnuts

Lentil salads are nutritious, filling, and perfect for a fresh, vibrant meal. This recipe combines earthy lentils with the sweetness of pomegranate seeds and the crunch of walnuts. It’s not only a great vegetarian option but also packed with protein, fiber, and antioxidants. Here’s a detailed guide to making this delicious salad.

Ingredients:

  • 1 cup green or brown lentils: Lentils serve as the base of the salad. They have a hearty texture and mild flavor that pairs well with the tangy dressing.
  • 1 cup pomegranate seeds: These add a burst of sweet and tart flavor, along with vibrant color.
  • ½ cup walnuts: For crunch and a touch of bitterness that contrasts nicely with the other ingredients.
  • 1 small red onion, finely diced: Adds sharpness and bite.
  • 1 cucumber, diced: Offers freshness and a crisp texture.
  • 2 tablespoons fresh parsley, chopped: Adds an herbaceous note.
  • 1 tablespoon fresh mint, chopped (optional): Enhances the salad with a refreshing flavor.

For the Dressing:

  • 3 tablespoons olive oil: The base of the dressing, adding richness.
  • 1 tablespoon lemon juice: Provides acidity and brightness.
  • 1 tablespoon balsamic vinegar: Adds depth and a touch of sweetness.
  • 1 teaspoon Dijon mustard: For a slight tang and creaminess.
  • Salt and pepper to taste.

Step-by-Step Instructions:

  1. Cook the Lentils:
    Start by rinsing the lentils under cold water to remove any impurities. Add them to a pot with 3 cups of water. Bring the water to a boil, then reduce the heat and let the lentils simmer for about 20-25 minutes, until they are tender but not mushy. Drain any excess water and let the lentils cool.
  2. Prepare the Ingredients:
    While the lentils are cooking, deseed the pomegranate, finely dice the onion, and chop the cucumber, parsley, and walnuts. Set aside the ingredients for easy assembly later.
  3. Make the Dressing:
    In a small bowl, whisk together the olive oil, lemon juice, balsamic vinegar, and Dijon mustard. Season with salt and pepper. Taste and adjust the seasoning to your liking.
  4. Assemble the Salad:
    Once the lentils have cooled, place them in a large bowl. Add the diced red onion, cucumber, parsley, mint (if using), pomegranate seeds, and walnuts. Pour the dressing over the salad and toss everything gently to combine, ensuring the dressing coats all the ingredients.
  5. Serve:
    Transfer the salad to a serving dish and garnish with extra parsley or pomegranate seeds for presentation. You can enjoy it immediately or refrigerate it for an hour to let the flavors meld together.

Tips:

  • Make it ahead: This salad can be made a day in advance. The flavors will only improve as the lentils soak up the dressing.
  • Variations: You can add feta cheese for extra creaminess or swap walnuts for almonds or pistachios.
  • Serving suggestions: Serve this salad as a side dish or a main course for a light lunch.

Enjoy your fresh and flavorful lentil salad!

Pumpkin Hummus Recipe

Introduction
Pumpkin hummus is a flavorful twist on the classic Middle Eastern dip, offering a rich and creamy texture with a subtle sweetness. The addition of pumpkin brings a delightful autumn flavor, making it perfect for fall gatherings or as a nutritious snack year-round. Below is a guide to making this easy, delicious dip at home.

Ingredients:

  • 1 cup of pumpkin puree (either canned or homemade)
  • 1 can (15 oz) of chickpeas, drained and rinsed
  • ¼ cup of tahini (sesame seed paste)
  • 2 tablespoons of olive oil
  • 2 cloves of garlic, minced
  • Juice of 1 lemon
  • ½ teaspoon of ground cumin
  • ½ teaspoon of smoked paprika (optional, for garnish)
  • Salt and pepper to taste
  • A sprinkle of pumpkin seeds (optional, for garnish)

Step-by-Step Instructions:

  1. Prepare the Chickpeas
    Drain and rinse the canned chickpeas to remove any excess sodium. This step also helps in reducing the beany taste and improving the overall texture of the hummus.
  2. Blend the Ingredients
    In a food processor, combine the chickpeas, pumpkin puree, tahini, garlic, lemon juice, cumin, and olive oil. Blend until smooth. You may need to stop the processor occasionally to scrape down the sides to ensure all ingredients are well incorporated.
  3. Adjust the Texture
    If the mixture is too thick, you can add a tablespoon or two of water or more olive oil to reach your desired consistency. Blend again until smooth and creamy.
  4. Season to Taste
    Once the hummus has reached your preferred texture, add salt and pepper to taste. Blend for another 10-15 seconds to evenly distribute the seasoning.
  5. Garnish and Serve
    Transfer the hummus to a serving bowl. For a beautiful finish, drizzle a bit of olive oil on top, sprinkle with smoked paprika, and add pumpkin seeds for extra crunch.

Serving Suggestions
Serve the pumpkin hummus with pita bread, crackers, or fresh vegetable sticks like carrots, cucumbers, or bell peppers. It’s also great as a spread in sandwiches or wraps.

Storage
Pumpkin hummus can be stored in an airtight container in the refrigerator for up to 5 days. The flavors often deepen after a day, making it even tastier!

Nutritional Benefits
Pumpkin is rich in vitamin A and antioxidants, while chickpeas are packed with fiber and protein. Together, they make a nourishing snack or appetizer that’s perfect for autumn or anytime you’re craving something creamy and flavorful.

How to Make Moroccan Chickpea Tagine

Moroccan Chickpea Tagine is a comforting, flavorful dish packed with aromatic spices, vegetables, and hearty chickpeas. It’s a wonderful option for those seeking a plant-based meal that’s rich in nutrients and easy to prepare. Let’s walk through the ingredients and steps to make this traditional North African dish.

Ingredients

  • 2 cans chickpeas, drained and rinsed
  • 1 large onion, chopped
  • 3 garlic cloves, minced
  • 2 carrots, sliced
  • 1 zucchini, diced
  • 1 can diced tomatoes
  • 1/4 cup dried apricots, chopped (optional for sweetness)
  • 1/4 cup raisins (optional)
  • 1 tbsp olive oil
  • 1 tsp ground cumin
  • 1 tsp ground coriander
  • 1 tsp ground cinnamon
  • 1/2 tsp ground turmeric
  • 1 tsp paprika
  • 1/2 tsp cayenne pepper (optional for heat)
  • 1 tsp ground ginger
  • Salt and pepper to taste
  • 2 cups vegetable broth
  • Fresh cilantro for garnish
  • Cooked couscous or rice, to serve

Step-by-Step Instructions

  1. Prepare the base
    Heat olive oil in a large pot or traditional tagine over medium heat. Add the chopped onion and garlic, sautéing them until softened and fragrant (about 5 minutes).
  2. Add the vegetables
    Stir in the carrots and zucchini, cooking them for an additional 3-4 minutes. You can adjust the vegetables based on what’s in season—eggplant or bell peppers work well too.
  3. Spice it up
    Mix in all the spices: cumin, coriander, cinnamon, turmeric, paprika, ginger, and cayenne (if using). Stir well to coat the vegetables with the spices, allowing the flavors to bloom.
  4. Incorporate the chickpeas and tomatoes
    Add the chickpeas, diced tomatoes, dried apricots, and raisins. The apricots and raisins are optional but provide a nice sweetness that complements the spices. Stir to combine.
  5. Simmer with broth
    Pour in the vegetable broth, bring the mixture to a simmer, then lower the heat and cover. Let the tagine cook gently for 20-25 minutes, allowing the vegetables to soften and the flavors to meld.
  6. Adjust seasoning and consistency
    Taste the tagine and adjust seasoning with salt and pepper. If you prefer a thicker sauce, simmer uncovered for an additional 5 minutes to let the liquid reduce.
  7. Serve and garnish
    Serve your chickpea tagine over fluffy couscous or rice. Garnish with freshly chopped cilantro for a bright, herbal finish.

Tips for the Best Chickpea Tagine

  • Use a traditional tagine: If you have a ceramic tagine, it’s perfect for slow-cooking and enhancing the flavors.
  • Customize the veggies: Feel free to swap in other vegetables you enjoy, like eggplant or sweet potatoes.
  • Make it ahead: The flavors of the tagine improve with time, making it an ideal dish to prepare in advance.

This Moroccan Chickpea Tagine is a delicious, warming meal that brings the exotic spices of North Africa into your kitchen. Enjoy it with family or friends, paired with couscous or a simple side salad!